
I hate all those recipes that tell you how easy it is to make pâte brisée (tart dough) – rub the butter and flour together, add a little ice water, don’t handle too much, and you are done. If it was that easy, there’d be way more good pies and tarts in this world.
I set out on the tart dough quest 6 years ago (after spending a semester in France). 50+ tarts later I can finally say that I have achieved perfection. Though I don’t see a reason why perfect pie dough should take this much experimentation.
If only the recipes spent more time on the basics and less time on the “butter vs. shortening” and “all-purpose vs. pastry flour” debates, I think I'd be all set. The thing is -- it’s all about the technique, not the ingredients. All-purpose flour is just fine. And I prefer using all butter since it gives the dough more flavor. The rest as they say is “in the wrist.”
So, if you’ll stop at nothing to achieve delicate, buttery, flaky tart dough, keep on reading.
Illustrated Guide to Pâte Brisée (tart and pie dough)
These instructions describe how to make tart dough with a stand-up mixer, which I find to be the easiest method. You could also use a food processor or a pastry blender.
For two 10 inch tarts (savory or sweet)
Ingredients:
2 1/2 sticks butter, chilled (refrigerator temperature)
3 cups unbleached all-purpose flour (13.5 oz)
1 tsp table salt (or 2 tsp Diamond Crystal kosher salt)
2 tsp sugar
1 cup ice water (you'll only need about half of it)
1 tsp distilled white vinegar
Special Equipment:
Stand-up mixer
Dough scraper
Step 1: Freeze the bowl and the flat beater of a stand-up mixer until cold, about 5 minutes.
Step 2: Cut the butter into 1/4 inch cubes. Place on a plate and freeze for 10 minutes (but no longer).

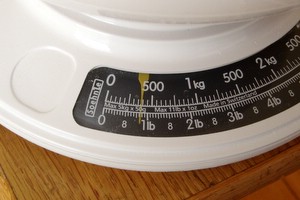
Step 3: Measure the flour. Precision is extremely important here. If you end up with too much flour (which is what happens if you scoop it with a measuring cup), your dough will be tough and hard to roll out. Measuring flour by weight is the only accurate way. So if you have a scale, use it to measure 13.5 oz of flour.
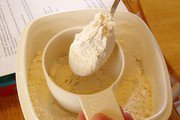
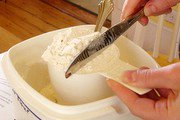
If you don’t have a scale, stir the flour with a spoon to fluff it, spoon it into a measuring cup, and level off excess with a knife. Do not scoop flour with a measuring cup as you will compress it.
Step 4: Attach the chilled bowl and the flat beater to your mixer. Add the flour, salt, and sugar. Mix on low speed until combined, about 30 seconds.
Step 5: Add the butter and toss with your hands to coat each butter cube with flour.
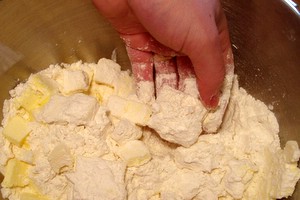
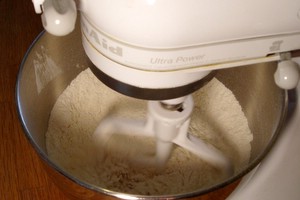
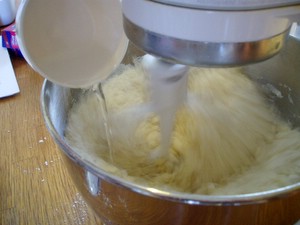
Cover the mixer with a towel to avoid flour splashes, and mix on low until the butter lumps are the size of peas and the mixture is the consistency of oatmeal. It’s better to under-process than over-process. Since the bowl is covered with a towel, stop the mixer every 20 seconds to see how it’s going (it is likely to take about 1 minute total). If chunks of butter get stuck, scrape down the bowl with a rubber spatula.
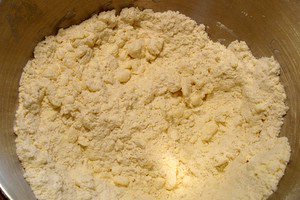
Here is what the mixture should look like when you are done.
Step 6: Add the vinegar to the ice water and mix well. Measure out 1/2 cup of this liquid (without ice-cubes).
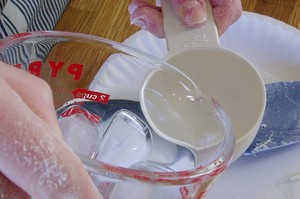
With the mixer running on low, slowly drizzle in 1/2 cup of liquid into the dough. After all the water is in, give it another 5 seconds and turn off the mixer.
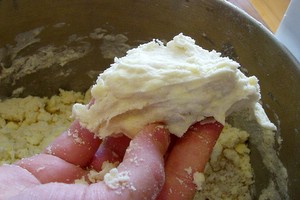
Pick up a chunk of dough and squeeze it in a fist. If the dough holds its shape, it’s done. If it still feels sandy and falls apart as soon as you let it go, turn the mixer back on, and drizzle in more water 1 Tbsp at a time. Test after each addition.
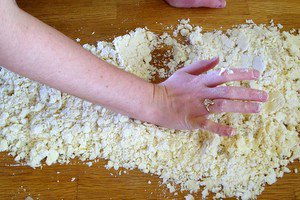
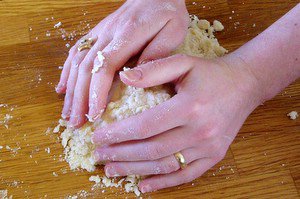
Step 7: Turn out the dough onto a clean counter and arrange it into a large rectangle (8 inch by 15 inch).

Starting on one short side of the rectangle and working your way to the other, smear each bit of dough with the heel of your hand in short quick strokes. The whole procedure should take about 30 seconds, so be quick or the butter will start to melt. This creates layers of butter and flour and will make your dough more flaky.
Gather up the dough with a pastry scraper.

Divide the dough into 2 piles.
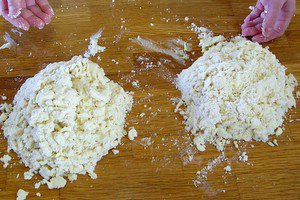
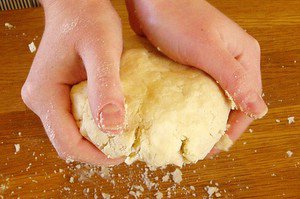
Step 8: Force each pile into a thick disk.
It might not want to stay together, but you need to show it who is the boss. If it is too crumbly, kneed it shortly (just 4-5 folds and turns).
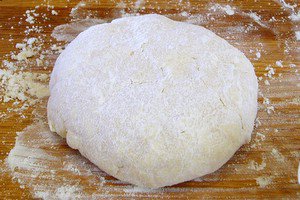
Sprinkle each disk with flour on both sides, wrap tightly in plastic and refrigerate at least for 2 hours and up to 2 days, or freeze for up to 2 months. Phew, you are done!
Hmm, I believe this is the longest post I’ve written since starting this blog, so I saved the rolling out and baking instructions for the next post.
No, go on! Go on! I knead to read more ... I'm hooked now (sorry about the pun)!
ReplyDeletegreat primer! why is the vinegar necessary, i wonder?
ReplyDeleteHi Genevieve,
ReplyDeleteVinegar is optional. From what I hear, the acid hinders gluten development and will result in a more delicate pie dough. But I've never done a side by side tasting of pie dough made with vinegar and without it. If you don't have vinegar, just add a little lemon juice or skip it all together.
Cheers,
-Helen
Thank you, Helen!
ReplyDeleteI'm always looking for a new pate brisee recipe that I can try. I'm a huge fan of pie and apple is my favourite.
I shall most definitely give your recipe a try ... and the photos are fantastic!
I've never heard of using vinegar in pie dough. I can't wait to try it with my homebrew vinegar.
ReplyDeleteThis is wonderful. Your step-by-step pictures are very helpful.
ReplyDeleteI've recently posted on the struggles of doing this by hand, giving a recipe that I find works well. We discussed this briefly on Chowhound.com earlier this month. Thanks for the support! Nothing like a perfect pie crust...
Thanks for taking the time to put this up! I was having so much trouble with the technique I was using. I just used this recipe and technique and it came out perfectly. I feel like I now know what I am doing!
ReplyDeleteHi jennyg,
ReplyDeleteSo glad your tart dough came out well. I've been struggling with this techniques for years myself.
Cheers,
-Helen
This is THE BEST pie dough I have ever tasted. So soft and buttery...I can't even believe I made this myself. You are the best instructor!
ReplyDeleteHi Sara,
ReplyDeleteSo glad your pie dough worked out! It's a tricky technique to master and you did it :)
Cheers,
-Helen
I can't believe how easy this is. I can't wait to taste this crust. My kids and I did it in double batches... piece of cake (ahem, um pie)LOL.
ReplyDeleteThanks! =)
Hi Helen,
ReplyDeleteI am new in blogging and found your site searching around. Have never made tarts before and it's a pity since we have so nice fruit in Greece. Shall definitely try it, as soon as I get on my feet.
Ivy - www.kopiaste.blogspot.com
this is very thorough. thanks for sharing! I'll turn to this link the next time I want flakier scones or pie shell.
ReplyDeleteHi Helen,
ReplyDeleteI would love to try this recipe but I only need enough dough for an 8" tart. Do I halve the recipe? Or quarter it?
Hi MJ,
ReplyDeleteI would still make the full batch (at least if using a mixer). You can then freeze whatever you don't use. If making 8 inch tarts, I'd divide the dough into 3 parts. Having some tart dough in the freezer is always handy :) If you are very experienced with pie dough and don't need extras in case of cracking, you can divide the dough into 4 parts (each will be enough for an 8 inch tart), but I would err on the side of too much than too little dough and divide the batch into 3 rather than 4 pieces the first time you try it.
Cheers,
-Helen
Wonderful crust! I love it! Thank you so much for posting!
ReplyDeletehow long did u bake it?
ReplyDeleteand in what temperature?
thankss
click on the "rolling out and baking instructions" link in the end of the post for temperatures, baking times, etc.
ReplyDeleteThis is the best darn pie crust I have ever had or made. I will be using this for everything.
ReplyDeletewhat if I don't have a stand up mixwer?
ReplyDeleteYou can use a food processor or pastry blender hand tool.
ReplyDeleteHello Helen: Is this recipe appropriate for a Quiche? If yes, can you suggest a pre-bake time and temperature to set the crust?
ReplyDeleteyes, this will work for a quiche. Here are the rolling out and baking instructions
ReplyDeleteBut Cook's Illustrated Vodka pie dough will work even better for quiche. It tends to hold us to wet fillings better and is virtually impossible to mess up (as long as you weigh your flour, but that applies to all doughs). You can use my rolling out and baking instructions for it too.
Cheers,
-Helen
i dont have the pastry blender nor the food processor. i only have a blender. can i still make this kind of dough?
ReplyDeletepastry blender is a small metal tool for cutting butter into flour (it is not at all like an electric blender). You can always rub the butter into flour with your finger tips if you are a cold handed person and work very fast.
ReplyDeleteThis has become my pastry bible :-)
ReplyDeleteHi Helen. thank you for the very precise instructions. i'm going to try this.
ReplyDeleteKaren,
ReplyDeleteThis is a good, but very old post. I have an updated method on youtube.
If you look around my channel in the Thanksgiving or Dough sections, you'll also get instructions for dough by hand and rolling out.
Cheers,
-Helen
The crust is VERY yummy and the tips were super helpful! Thanks for sharing!
ReplyDeleteIf you don't have a pastry blender, mixer, or food processor use two flatware knives to cut in butter. Works great!
ReplyDelete